So it's been some time since the last update to everything or even a just a general post on something haha. Things have been pretty busy around here with work, moving my roommate out and finally getting things back in order in the apartment. The last post I did revolved around the baby rock flower anemones that I had, ~120 in total. Sad to say they didn't make it. Due to a huge hair algae outbreak in the tank, they were smothered and the ones that made it past the outbreak got lost in the rocks because they were to small for me to save.
When the outbreak started, I didn't think it would be that big of an issue. I moved what babies I could reach to a dish in the tank so I knew where they were and could target feed them when I fed the rest of the tank and they would, hopefully, stay away from the algae that was covering the rest of the rocks. Soon that wasn't even enough. As I fought the algae, I moved the babies to a breeder box on the side of the tank. That was a bad move. Soon the algae was in there as well. I then decided that I would move the remaining babies to their own 3 gallon tank. I don't know if it was the move or something else, but they soon disappeared...
I dismantled the 20 gallon in attempt to rid it of hair algae. I had some nice rock that was curing in a bucket that I decided to use. New sand was bought and an internal filter was made using acrylic and put into the tank. There's the overflow compartment that I can put a filter pad and a Phosphate remover pad in. Under that is an area for Cheato, since it's growing like a weed in the sump of the 75 Gallon, then there is the return section with a powerhead for a return pump.
The goals in doing this:
To be able to house the cheato in the tank to help with the algae.
Get rid of the ugly HOB filter.
Increase flow in the tank to kick crap out of the rocks and keep it suspended to get sucked into the overflow.
Give the tank a "cleaner" look.
Most of all: set the tank up the right way from the beginning...
When I first set this tank up I did so in a rush. I wanted an awesome Rock Flower Anemone garden. What I ended up with was a massive headache and a major mess I was always trying to clean up. Learning my lessons, I let the tank go for a month without anything in it. Then added the Cheato when I started to see algae growing on the rocks. ~20 small Limpets and ~30 small unknown snails were added to the tank shortly after that from the 75 display to start reproducing and help with the algae. After I was sure everything was good to go, I added the anemones to the tank with a couple other snails to clean up the remaining algae and keep it gone. One month later, everything is going great and will hopefully stay that way.
I'll be looking to add to the 6 Anemones in the tank to make a nice little colony of them with the hopes of them reproducing again and being able to raise some of them to maturity. Not much is out there as far as breeding these guys in our tanks. Most of it is just luck. I'm hoping to be able to put my experience with it all on here to help those who might want to do it as well. These little guys really are a great addition to a tank for people from expert hobbyists to the new people getting into the hobby.
Showing posts with label Saltwater aquarium. Show all posts
Showing posts with label Saltwater aquarium. Show all posts
Tuesday, January 2, 2018
Saturday, February 18, 2017
75 Gallon Tank Build!!!
So for the past few months (actually since about July of last year) I've been working on a 75 gallon tank to replace the 40 gallon breeder that I had set up. A little over a month ago I finished it, set it up and now it is fully running with a few more additions then the 40 gallon had. Mostly some corals, but a few new fish as well. Links are at the bottom of the post.
The stand is the same one that the 40 was set up on that I refurbished awhile ago, adding more support and a top for the stand. I also added a nice dark mahogany stain and new hinges on the doors.
This setup started with a 75 gallon tank that I got from a garage sale for $15. Damn good price for a tank that needed a little work and I was going to do a few other things to it as well. I got it all cleaned up and the first step was to get all the silicone out and put a new seal on the tank since I didn't trust it and had no idea how old it was.
Wednesday, February 11, 2015
Tank Upgrade
Well this was kind of a spur of the moment decision. I've been looking to upgrade the display tank for a little while now and was thinking of getting a 40 breeder or maybe even a 55 gallon and build a stand for it. A couple weeks ago I made a trip to my LFS and to my surprise I found my upgrade or at least I thought I had. A 75 gallon tank with a pine stand and sump/ external overflow and wouldn't you know... the price was perfect. At $75 I couldn't pass it up!! The stand needed to be sanded down and re stained, the sump and overflow weren't cracked or scratched and need to be cleaned. The tank though... This is the sad part. It seems the guy who owned it before me used some extremely hard water. This led to the front and back panels being etched... Well there went that. No 75 gallon tank for me. This brought me to the realization though that a 75 was a bit big for me right now anyways. So now it's just sitting here in my room waiting to be resold to someone who can use it for something else.
I started looking around on line and thought that maybe a 40 gallon would work. I have a buddy who has two of them so I went and took a look at them. They wont exactly fit the stand, but they will work and it just so happened that Petsmart had them on sale last week! So after all of this excitement and sadness I have my tank, stand, overflow and sump. Now all I need to do is finish staining the stand, clean the overflow and sump, and get the plumbing set up and I'm good to go. I'll have a page up shortly to follow my build of this tank. It'll be my first build page so we'll have to see how it goes. If I like it I might even post it to a forum haha.
Stay tuned! I'll have a few more posts and pages coming out here soon including my DIY acrylic frag stand, a hang-on-side frag rack and an update on the tanks!!
Saturday, December 27, 2014
Been awhile!
So it's been awhile since I posted an update. Everything's going good for the most part now. Byprosis is gone in the frag tank, corals are looking healthy, my girlfriends Duncan's made a full recovery in my frag tank and I've been sellin a few pieces here and there with a few freebies given as well.
I recently split up the frag tank into two partitions: one for frags and the other for anemones. I used two pieces of eggcrate as the divider and put them together so the holes were half the size as normal. It seemed to be working good while it was up. I recently took it down, however, to add more room to the frag rack and transferred the RBTAs to a Hang on breeder box where they can do whatever they please. The two RBTAs are still doing good, a nice deep red and bubbly. The RFAs are doing real well. My original one is constantly growing bigger. I got it when it was a baby about the size of a dime, now its about two and a half inches across. I'll probably do a review on the breeder box here soon as well as the Deep Blue Professional SolarFlare lights that I have had.
Monday, September 15, 2014
Red Bugs: Bayer Complete Insect Killer
This is going to be the recipe that was posted up on Nano-Reef.com by a member going by the name of jcarmon81 last year around this time. Here is the link to the thread and the post and his observations with it are towards the bottom.
http://www.nano-reef.com/topic/333832-discovered-some-red-bugs-in-my-sps-tank/
Of course I wont be using 30 Cups of it so I'll be scaling it down and storing a bit for when it's needed. I'll post my observations as well just to give my opinion on it to add to the multiple good reviews I've seen for it on the different forums.
Update: 26 Gallon Tank Extreme Clean!!!
So after careful consideration and planning I decided to do away with the 2" sand bed in the 26 gallon display. Looking at it after I cleaned it all out I realized that that was probably the best decision I've made in awhile. I grabbed a tote and put some of my tank water in it and removed all the corals, fish, and rocks and placed them in the tote and filled it up as much as possible. I filled up two more 2.5 gallon jugs with tank water too.
At this time I had about 2 gallons of water left in the tank and all the sand which I mixed up and ended up turning the rest of the water that was in the tank into like a chocolate milk color... This was from all the crap that had settled in the sand bed over the past couple years. This is where my nitrate and phosphate issues were coming from. I decided that I would rinse out the sand that I removed from the tank as well just out of curiosity. Man was I surprised. After 6 or 7 full buckets of water and a few times of just continuously running water into the sand the water was still a dark brown.
I added the leftover sand from my girlfriends tank to the little bit of sand that was still in the tank to end up with a little under 3/4" of sand on the bottom. As I mixed 10 gallons of fresh saltwater up I decided to get the rock back in and play with it until I got the look I've been going for for the past 3 years and I finally got it. I dumped in the newly mixed saltwater, the two 2.5 gallon jugs of previous tank water and then as much of the tank water from the tote as was needed to fill the tank up past the power head so I could turn on the filter to clean up the water a bit before adding anything.
After an hour or so I started putting coral into the tank and then the fish and finally topping off the tank. Total time for this project: about 5 hours. I took my time with it making sure that I had everything, cleaned everything, and placed everything right the first time so there was no messing with it after the fact. Now since the sand is so shallow, when I blow the rocks out I can also do it with the sand as well and not have to worry about releasing 2" of crap and who knows what else into the tank. To help with keeping the sand bed clean I've added my girlfriends Orange Spotted Goby who kept jumping from her tank because he was to big for it. Now he has plenty of room in my tank to do what he pleases.
As far as the Red Bugs go, I haven't had a chance to make up the dip and try it out, but I will be doing that tonight and posting about it. I will also be posting up the recipe for it on here as well. Now it's picture time!
The tank before the tear down and cleaning

After the water, rock and sand have been removed and cleaned and the rock and sand were replaced. The front glass still needs to be cleaned off.

This is shortly after everything was put back in. It was still a bit cloudy, but everything was good.

 A FTS as of yesterday morning about an hour after the lights came on. The water is nice and clear, the fish are all active, and the corals are all open and happy (except for the Blue Stag that has the Red Bugs...).

At this time I had about 2 gallons of water left in the tank and all the sand which I mixed up and ended up turning the rest of the water that was in the tank into like a chocolate milk color... This was from all the crap that had settled in the sand bed over the past couple years. This is where my nitrate and phosphate issues were coming from. I decided that I would rinse out the sand that I removed from the tank as well just out of curiosity. Man was I surprised. After 6 or 7 full buckets of water and a few times of just continuously running water into the sand the water was still a dark brown.
I added the leftover sand from my girlfriends tank to the little bit of sand that was still in the tank to end up with a little under 3/4" of sand on the bottom. As I mixed 10 gallons of fresh saltwater up I decided to get the rock back in and play with it until I got the look I've been going for for the past 3 years and I finally got it. I dumped in the newly mixed saltwater, the two 2.5 gallon jugs of previous tank water and then as much of the tank water from the tote as was needed to fill the tank up past the power head so I could turn on the filter to clean up the water a bit before adding anything.
After an hour or so I started putting coral into the tank and then the fish and finally topping off the tank. Total time for this project: about 5 hours. I took my time with it making sure that I had everything, cleaned everything, and placed everything right the first time so there was no messing with it after the fact. Now since the sand is so shallow, when I blow the rocks out I can also do it with the sand as well and not have to worry about releasing 2" of crap and who knows what else into the tank. To help with keeping the sand bed clean I've added my girlfriends Orange Spotted Goby who kept jumping from her tank because he was to big for it. Now he has plenty of room in my tank to do what he pleases.
As far as the Red Bugs go, I haven't had a chance to make up the dip and try it out, but I will be doing that tonight and posting about it. I will also be posting up the recipe for it on here as well. Now it's picture time!
The tank before the tear down and cleaning
After the water, rock and sand have been removed and cleaned and the rock and sand were replaced. The front glass still needs to be cleaned off.
This is shortly after everything was put back in. It was still a bit cloudy, but everything was good.
Thursday, September 4, 2014
20 Gallon Long Frag Tank Update
So since I was already doing a water change in the display I figured I would do one in the frag tank as well. Ever since I took the Scopus tank out of here and added the RBTA's I've been having a bit of an algae problem as you can see from the pictures. I wanted something else to help control it so when I was at my LFS I bought a small Sailfin Tang and an emerald crab to help keep the hair algae down until I can get a bigger filter.
In the previous post I mentioned that I bought a few pieces of Green Staghorn that were thrown into the LR bin at my LFS. They are a little worse for wear, but I may be able to bring them back with a little care. I cut some small pieces off the three bigger ones because the tissue wasn't attached. For some reason, I'm thinking that these small frags will recover better than the bigger ones. The tissue has become very thin due to being in the LR bin for a day or two with crappy light and water.

In the previous post I mentioned that I bought a few pieces of Green Staghorn that were thrown into the LR bin at my LFS. They are a little worse for wear, but I may be able to bring them back with a little care. I cut some small pieces off the three bigger ones because the tissue wasn't attached. For some reason, I'm thinking that these small frags will recover better than the bigger ones. The tissue has become very thin due to being in the LR bin for a day or two with crappy light and water.


Wednesday, September 3, 2014
26 Gallon Display Tank Update
I hadn't done a water change in awhile and since I'm not running a sump or fuge with this tank I figured I needed to do one. I did a 10 gallon water change last Thursday and added some carbon to the filter before I went north for the holiday, but when I got back something still seemed off to me. Everything looked fine, but a film had developed on the glass and there was no polyp extension on my Blue Staghorn. So I decided to do another 10 gallon water change. And boy am I glad I did.

I tend to take a real good, close look at my tanks before, during, and after a water change and tonight was no different and that's when I saw them... Red Bugs. All over my Blue Staghorn. These little bugs are an SPS keepers worst nightmare. It's a good thug I caught it though since I was going to add one of 7 different Green Staghorn frags I got and made up today (got an awesome deal: 2 bigger pieces for $10 ea and another for $5 cause they were dying pieces that my LFS had trimmed off a colony and put in the LR bin. I cut 4 more frags from these where it was just a little branch with tissue not connected to the main tissue). I'll be doing the dip tomorrow to see how it goes and give an update on my Red Bug situation during the next week.
Wednesday, August 20, 2014
Corals Under LED's!!
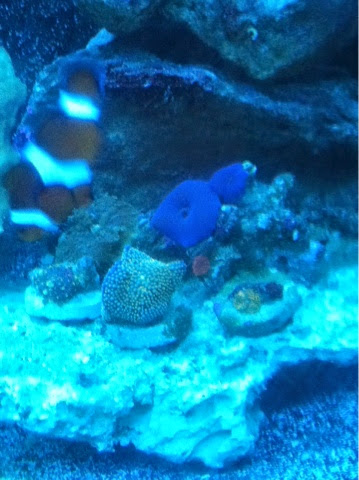
For the longest time I've admired the color of corals under blue LED's. To me they look so much more eye catching than when they are under other actinic lighting. Capturing that color in photos has always been on the back of my mind, but every time I've tried it I failed miserably. Until yesterday.
After I finished with the water change and frag rack replacement yesterday, I figured I would grab the camera again and try to capture that amazing color again. Photo after photo just kept turning out too blue or purple. I took a look online and realized that I had forgot the most basic step in video and photography: White Balance. I felt so stupid afterwards since I had taken so many video and photography through high school and college. I set the camera's white balance to custom, took a picture of an empty spot on the frag rack, set the custom white balance to balance off of that picture and started shooting again and with a couple minor adjustments to some of the other settings, I had my photos. Now all I need is a macro lens... These are some of the results:


After I finished with the water change and frag rack replacement yesterday, I figured I would grab the camera again and try to capture that amazing color again. Photo after photo just kept turning out too blue or purple. I took a look online and realized that I had forgot the most basic step in video and photography: White Balance. I felt so stupid afterwards since I had taken so many video and photography through high school and college. I set the camera's white balance to custom, took a picture of an empty spot on the frag rack, set the custom white balance to balance off of that picture and started shooting again and with a couple minor adjustments to some of the other settings, I had my photos. Now all I need is a macro lens... These are some of the results:
Build a Better Frag Rack
So yesterday I decided to do some rework on my frag tank when I took everything out to clean the bottom. I'm glad to say there is no more Cyanobacteria. I did make a new frag rack that now spans almost the entire bottom of my tank as well as has two raised platforms for more light needing corals. I do like the look of this one much better because it gives me not only more room, but it makes the tank look more open as well. It's almost exactly like the pic I posted yesterday.
Before, I was using a 3 tier rack that I had in my 10 gallon. For that tank it was the perfect size. However, I needed more room in my 20 gallon and wanted a rack that would be able to handle the amount of frags I wanted to put in there, as well as make it look a little cleaner. This led me to make the rack in this design. It allows me to put corals wherever they need to be as far as flow and light are concerned.

After:
Now, what is the main reason frag racks are made? Personally I build them to be able to use as much room in my frag tank as I can, but I've also built them to keep frags in my display tank. These are also, from what I've read, what the majority of other people build racks for as well. Another reason I've seen is to keep the Cleanup Crew from knocking the frags around as they sit on the sand in the tank.
They can be made of anything from egg crate (light diffuser) to acrylic and held together with glue, zip ties, or epoxy. Depending on what is being kept on the rack, the size and shape of the tank, as well as the lighting, frag racks are made in all different shapes. The most common one I've seen is just a flat platform raised up off the bottom with either PVC legs or egg crate legs. People are keeping softies, LPS and SPS on these kinds of racks, they just change the lighting depending on the coral. If keeping a mixed frag tank, usually raised platforms are a good idea so you can put corals that need more light up higher and don't have to buy a new light.
Before, I was using a 3 tier rack that I had in my 10 gallon. For that tank it was the perfect size. However, I needed more room in my 20 gallon and wanted a rack that would be able to handle the amount of frags I wanted to put in there, as well as make it look a little cleaner. This led me to make the rack in this design. It allows me to put corals wherever they need to be as far as flow and light are concerned.
Before:
Now, what is the main reason frag racks are made? Personally I build them to be able to use as much room in my frag tank as I can, but I've also built them to keep frags in my display tank. These are also, from what I've read, what the majority of other people build racks for as well. Another reason I've seen is to keep the Cleanup Crew from knocking the frags around as they sit on the sand in the tank.
They can be made of anything from egg crate (light diffuser) to acrylic and held together with glue, zip ties, or epoxy. Depending on what is being kept on the rack, the size and shape of the tank, as well as the lighting, frag racks are made in all different shapes. The most common one I've seen is just a flat platform raised up off the bottom with either PVC legs or egg crate legs. People are keeping softies, LPS and SPS on these kinds of racks, they just change the lighting depending on the coral. If keeping a mixed frag tank, usually raised platforms are a good idea so you can put corals that need more light up higher and don't have to buy a new light.
Friday, August 15, 2014
The Weekend is upon us!
So this weekend my tanks are going to get a much needed cleaning... I've kinda neglected them for a little because I was so busy. I need to do a major water change in the display cause I haven't for about a month, a big water change needs to be done in the frag tank as well. Oddly enough I have cyno growing on the bottom of the tank to the point that it's starting to bubble up. I can easily get it up but I think what I might do is pull out the frag racks and do a whole tank cleaning. I'll probably start on it today when I get home actually. Everything is still looking good though which is kind of surprising. I can almost guess what the nitrates are and I cringe when I do. I should add a small CC, but that just adds more crap to the water. After this weekend though everything should be good.
I also am going to try and figure out what to do with the mushroom frags I just cut. Do I glue them to a rock and make a few colonies of different kinds/ colors of shrooms or do I put the Yumas and Floridas on frag plugs to keep them separate or build some colonies and some frags? Either way I look at it I need to get rid of some because I'm pretty much out of room. I suppose I could make up another 3 tier rack to go along with the one I have now instead of using random racks and put the rock on a rack underneath it...
I also am going to try and figure out what to do with the mushroom frags I just cut. Do I glue them to a rock and make a few colonies of different kinds/ colors of shrooms or do I put the Yumas and Floridas on frag plugs to keep them separate or build some colonies and some frags? Either way I look at it I need to get rid of some because I'm pretty much out of room. I suppose I could make up another 3 tier rack to go along with the one I have now instead of using random racks and put the rock on a rack underneath it...
Saturday, August 9, 2014
RBTA update!
So when I got these two little guys, well two halves of a little guy, they had just been split on accident by the seller. I was about 90% sure that they would be fine and it turns out I was correct. Within the two weeks I've had them they've healed up nicely and are accepting what I give them for food which is usually mysis every other day and a few small chunks of deboned silverside on the weekend. Next time I feed them I'll try taking a video of them feeding along with my rock flowers who greedily accept anything haha but a pic for now is all I have which is not the best due to the LEDs.

Sunday, August 3, 2014
Sunday, July 27, 2014
Headed out to a Frag swap in Flint today. Mostly just to see whats there. Not really in the need for anything, but then again when do I ever NEED more coral lol.
The Frag tank is pretty full right now. I've got some yumas and ricordea healing from fragging a week ago. I might post a few frags up on Michigan Reefers soon just to empty out the tank a bit. I've also been looking at upgrading the lights on both tanks which will be easy if i can find a decent priced T5 HO for the display.
The Frag tank is pretty full right now. I've got some yumas and ricordea healing from fragging a week ago. I might post a few frags up on Michigan Reefers soon just to empty out the tank a bit. I've also been looking at upgrading the lights on both tanks which will be easy if i can find a decent priced T5 HO for the display.
Saturday, July 5, 2014


Tuesday, July 1, 2014
Just some details...
Alright... so everything seems to be on track as of right now. The thing I love about this tank is that it is running and has been running without any expensive equipment.
My maintenance routine includes:
My maintenance routine includes:
- Weekly 5- 10 gallon water changes,
- Replace the filter floss twice weekly,
- Feed the tank a little every other day and once a week heavy feeding for the fish and feed the LPS the day before the water change,
- Blow the rocks off every other day
- One drop of iodine mid-week
- Check the chemicals once a week and add magnesium if needed
This has kept the tank going well without much issue, including nuisance algae, for a little over two years now.
Livestock includes:
- Two clownfish
- A yellow watchman goby
- A banded brittle star
- A decent sized pom-pom crab
As far as corals go:
- orange montipora cap
- green and blue polyp montipora cap
- purple with green polyp montipora cap
- orange montipora dig
- green and kryptonite candy cane colonies
- baseball sized colony of galaxiea
- two small frags of purple and blue stylophora
- small frag of green porcillipora
- three different brain colonies
- two common paly colonies
- a frag of pavona
- a colony of branching duncan
- misc mushrooms including a purple and green yuma and a green and orange ric florida
- a nice frag of blue stag that is starting to get its blue color back
- a few pieces of green slimmer that are slowly recovering
- a baby piece of green loripes that i cut off of a dying colony
Everything has growth on it from within the last few weeks since it crashed due to a heater malfunction.
Saturday, June 21, 2014
Starting a Blog
So I decided that I would start a blog to help me keep track of my 26 Gallon display as well as the frag tank I have running. Not just for my own personal reasons but to show it off as well. Unfortunately my display crashed about a month ago and I lost a couple nice sized pieces but everything is good now and I'm starting to repopulate it slowly. The frag tank has been going nicely since started about a year ago and I was able to throw a couple pieces crime there into the display. The rockwork was redone after the crash but there is only so much I can do with it due to it being such a tall tank with the lights I have.


Subscribe to:
Posts (Atom)