So as of today the Red Bugs on the Blue Stag have not returned so I'll call that a success. However, after dipping the zoa frags a few times it seems that the Byprosis is just as resilient as ever. It kind of faded away for a day or so looking like it would die off, but was back a couple days later in full force. I need to find a way to take care of this stuff cheaply. Yes I know, some of you may say that there is nothing cheap about this hobby and I will agree to some point, but the point of this blog is to find a way to keep reefs somewhat inexpensively. The majority of us, including myself, don't have hundreds of dollars to spend on keeping reefs.
Showing posts with label reef tank maintenance. Show all posts
Showing posts with label reef tank maintenance. Show all posts
Tuesday, September 30, 2014
Monday, September 15, 2014
Red Bugs: Bayer Complete Insect Killer
This is going to be the recipe that was posted up on Nano-Reef.com by a member going by the name of jcarmon81 last year around this time. Here is the link to the thread and the post and his observations with it are towards the bottom.
http://www.nano-reef.com/topic/333832-discovered-some-red-bugs-in-my-sps-tank/
Of course I wont be using 30 Cups of it so I'll be scaling it down and storing a bit for when it's needed. I'll post my observations as well just to give my opinion on it to add to the multiple good reviews I've seen for it on the different forums.
Update: 26 Gallon Tank Extreme Clean!!!
So after careful consideration and planning I decided to do away with the 2" sand bed in the 26 gallon display. Looking at it after I cleaned it all out I realized that that was probably the best decision I've made in awhile. I grabbed a tote and put some of my tank water in it and removed all the corals, fish, and rocks and placed them in the tote and filled it up as much as possible. I filled up two more 2.5 gallon jugs with tank water too.
At this time I had about 2 gallons of water left in the tank and all the sand which I mixed up and ended up turning the rest of the water that was in the tank into like a chocolate milk color... This was from all the crap that had settled in the sand bed over the past couple years. This is where my nitrate and phosphate issues were coming from. I decided that I would rinse out the sand that I removed from the tank as well just out of curiosity. Man was I surprised. After 6 or 7 full buckets of water and a few times of just continuously running water into the sand the water was still a dark brown.
I added the leftover sand from my girlfriends tank to the little bit of sand that was still in the tank to end up with a little under 3/4" of sand on the bottom. As I mixed 10 gallons of fresh saltwater up I decided to get the rock back in and play with it until I got the look I've been going for for the past 3 years and I finally got it. I dumped in the newly mixed saltwater, the two 2.5 gallon jugs of previous tank water and then as much of the tank water from the tote as was needed to fill the tank up past the power head so I could turn on the filter to clean up the water a bit before adding anything.
After an hour or so I started putting coral into the tank and then the fish and finally topping off the tank. Total time for this project: about 5 hours. I took my time with it making sure that I had everything, cleaned everything, and placed everything right the first time so there was no messing with it after the fact. Now since the sand is so shallow, when I blow the rocks out I can also do it with the sand as well and not have to worry about releasing 2" of crap and who knows what else into the tank. To help with keeping the sand bed clean I've added my girlfriends Orange Spotted Goby who kept jumping from her tank because he was to big for it. Now he has plenty of room in my tank to do what he pleases.
As far as the Red Bugs go, I haven't had a chance to make up the dip and try it out, but I will be doing that tonight and posting about it. I will also be posting up the recipe for it on here as well. Now it's picture time!
The tank before the tear down and cleaning

After the water, rock and sand have been removed and cleaned and the rock and sand were replaced. The front glass still needs to be cleaned off.

This is shortly after everything was put back in. It was still a bit cloudy, but everything was good.

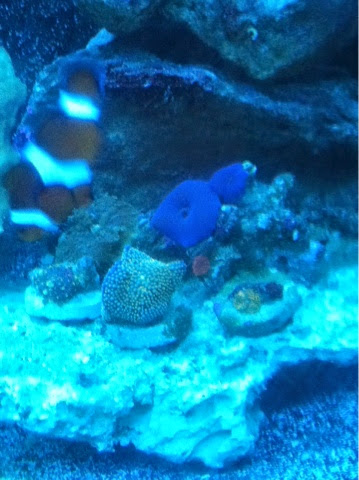
 A FTS as of yesterday morning about an hour after the lights came on. The water is nice and clear, the fish are all active, and the corals are all open and happy (except for the Blue Stag that has the Red Bugs...).

At this time I had about 2 gallons of water left in the tank and all the sand which I mixed up and ended up turning the rest of the water that was in the tank into like a chocolate milk color... This was from all the crap that had settled in the sand bed over the past couple years. This is where my nitrate and phosphate issues were coming from. I decided that I would rinse out the sand that I removed from the tank as well just out of curiosity. Man was I surprised. After 6 or 7 full buckets of water and a few times of just continuously running water into the sand the water was still a dark brown.
I added the leftover sand from my girlfriends tank to the little bit of sand that was still in the tank to end up with a little under 3/4" of sand on the bottom. As I mixed 10 gallons of fresh saltwater up I decided to get the rock back in and play with it until I got the look I've been going for for the past 3 years and I finally got it. I dumped in the newly mixed saltwater, the two 2.5 gallon jugs of previous tank water and then as much of the tank water from the tote as was needed to fill the tank up past the power head so I could turn on the filter to clean up the water a bit before adding anything.
After an hour or so I started putting coral into the tank and then the fish and finally topping off the tank. Total time for this project: about 5 hours. I took my time with it making sure that I had everything, cleaned everything, and placed everything right the first time so there was no messing with it after the fact. Now since the sand is so shallow, when I blow the rocks out I can also do it with the sand as well and not have to worry about releasing 2" of crap and who knows what else into the tank. To help with keeping the sand bed clean I've added my girlfriends Orange Spotted Goby who kept jumping from her tank because he was to big for it. Now he has plenty of room in my tank to do what he pleases.
As far as the Red Bugs go, I haven't had a chance to make up the dip and try it out, but I will be doing that tonight and posting about it. I will also be posting up the recipe for it on here as well. Now it's picture time!
The tank before the tear down and cleaning
After the water, rock and sand have been removed and cleaned and the rock and sand were replaced. The front glass still needs to be cleaned off.
This is shortly after everything was put back in. It was still a bit cloudy, but everything was good.
Wednesday, September 3, 2014
26 Gallon Display Tank Update
I hadn't done a water change in awhile and since I'm not running a sump or fuge with this tank I figured I needed to do one. I did a 10 gallon water change last Thursday and added some carbon to the filter before I went north for the holiday, but when I got back something still seemed off to me. Everything looked fine, but a film had developed on the glass and there was no polyp extension on my Blue Staghorn. So I decided to do another 10 gallon water change. And boy am I glad I did.

I tend to take a real good, close look at my tanks before, during, and after a water change and tonight was no different and that's when I saw them... Red Bugs. All over my Blue Staghorn. These little bugs are an SPS keepers worst nightmare. It's a good thug I caught it though since I was going to add one of 7 different Green Staghorn frags I got and made up today (got an awesome deal: 2 bigger pieces for $10 ea and another for $5 cause they were dying pieces that my LFS had trimmed off a colony and put in the LR bin. I cut 4 more frags from these where it was just a little branch with tissue not connected to the main tissue). I'll be doing the dip tomorrow to see how it goes and give an update on my Red Bug situation during the next week.
Wednesday, August 20, 2014
Build a Better Frag Rack
So yesterday I decided to do some rework on my frag tank when I took everything out to clean the bottom. I'm glad to say there is no more Cyanobacteria. I did make a new frag rack that now spans almost the entire bottom of my tank as well as has two raised platforms for more light needing corals. I do like the look of this one much better because it gives me not only more room, but it makes the tank look more open as well. It's almost exactly like the pic I posted yesterday.
Before, I was using a 3 tier rack that I had in my 10 gallon. For that tank it was the perfect size. However, I needed more room in my 20 gallon and wanted a rack that would be able to handle the amount of frags I wanted to put in there, as well as make it look a little cleaner. This led me to make the rack in this design. It allows me to put corals wherever they need to be as far as flow and light are concerned.

After:
Now, what is the main reason frag racks are made? Personally I build them to be able to use as much room in my frag tank as I can, but I've also built them to keep frags in my display tank. These are also, from what I've read, what the majority of other people build racks for as well. Another reason I've seen is to keep the Cleanup Crew from knocking the frags around as they sit on the sand in the tank.
They can be made of anything from egg crate (light diffuser) to acrylic and held together with glue, zip ties, or epoxy. Depending on what is being kept on the rack, the size and shape of the tank, as well as the lighting, frag racks are made in all different shapes. The most common one I've seen is just a flat platform raised up off the bottom with either PVC legs or egg crate legs. People are keeping softies, LPS and SPS on these kinds of racks, they just change the lighting depending on the coral. If keeping a mixed frag tank, usually raised platforms are a good idea so you can put corals that need more light up higher and don't have to buy a new light.
Before, I was using a 3 tier rack that I had in my 10 gallon. For that tank it was the perfect size. However, I needed more room in my 20 gallon and wanted a rack that would be able to handle the amount of frags I wanted to put in there, as well as make it look a little cleaner. This led me to make the rack in this design. It allows me to put corals wherever they need to be as far as flow and light are concerned.
Before:
Now, what is the main reason frag racks are made? Personally I build them to be able to use as much room in my frag tank as I can, but I've also built them to keep frags in my display tank. These are also, from what I've read, what the majority of other people build racks for as well. Another reason I've seen is to keep the Cleanup Crew from knocking the frags around as they sit on the sand in the tank.
They can be made of anything from egg crate (light diffuser) to acrylic and held together with glue, zip ties, or epoxy. Depending on what is being kept on the rack, the size and shape of the tank, as well as the lighting, frag racks are made in all different shapes. The most common one I've seen is just a flat platform raised up off the bottom with either PVC legs or egg crate legs. People are keeping softies, LPS and SPS on these kinds of racks, they just change the lighting depending on the coral. If keeping a mixed frag tank, usually raised platforms are a good idea so you can put corals that need more light up higher and don't have to buy a new light.
Friday, August 15, 2014
The Weekend is upon us!
So this weekend my tanks are going to get a much needed cleaning... I've kinda neglected them for a little because I was so busy. I need to do a major water change in the display cause I haven't for about a month, a big water change needs to be done in the frag tank as well. Oddly enough I have cyno growing on the bottom of the tank to the point that it's starting to bubble up. I can easily get it up but I think what I might do is pull out the frag racks and do a whole tank cleaning. I'll probably start on it today when I get home actually. Everything is still looking good though which is kind of surprising. I can almost guess what the nitrates are and I cringe when I do. I should add a small CC, but that just adds more crap to the water. After this weekend though everything should be good.
I also am going to try and figure out what to do with the mushroom frags I just cut. Do I glue them to a rock and make a few colonies of different kinds/ colors of shrooms or do I put the Yumas and Floridas on frag plugs to keep them separate or build some colonies and some frags? Either way I look at it I need to get rid of some because I'm pretty much out of room. I suppose I could make up another 3 tier rack to go along with the one I have now instead of using random racks and put the rock on a rack underneath it...
I also am going to try and figure out what to do with the mushroom frags I just cut. Do I glue them to a rock and make a few colonies of different kinds/ colors of shrooms or do I put the Yumas and Floridas on frag plugs to keep them separate or build some colonies and some frags? Either way I look at it I need to get rid of some because I'm pretty much out of room. I suppose I could make up another 3 tier rack to go along with the one I have now instead of using random racks and put the rock on a rack underneath it...
Saturday, July 5, 2014


Tuesday, July 1, 2014
Just some details...
Alright... so everything seems to be on track as of right now. The thing I love about this tank is that it is running and has been running without any expensive equipment.
My maintenance routine includes:
My maintenance routine includes:
- Weekly 5- 10 gallon water changes,
- Replace the filter floss twice weekly,
- Feed the tank a little every other day and once a week heavy feeding for the fish and feed the LPS the day before the water change,
- Blow the rocks off every other day
- One drop of iodine mid-week
- Check the chemicals once a week and add magnesium if needed
This has kept the tank going well without much issue, including nuisance algae, for a little over two years now.
Livestock includes:
- Two clownfish
- A yellow watchman goby
- A banded brittle star
- A decent sized pom-pom crab
As far as corals go:
- orange montipora cap
- green and blue polyp montipora cap
- purple with green polyp montipora cap
- orange montipora dig
- green and kryptonite candy cane colonies
- baseball sized colony of galaxiea
- two small frags of purple and blue stylophora
- small frag of green porcillipora
- three different brain colonies
- two common paly colonies
- a frag of pavona
- a colony of branching duncan
- misc mushrooms including a purple and green yuma and a green and orange ric florida
- a nice frag of blue stag that is starting to get its blue color back
- a few pieces of green slimmer that are slowly recovering
- a baby piece of green loripes that i cut off of a dying colony
Everything has growth on it from within the last few weeks since it crashed due to a heater malfunction.
Subscribe to:
Posts (Atom)